CakeDC Blog

TIPS, INSIGHTS AND THE LATEST FROM THE EXPERTS BEHIND CAKEPHP

How to push Docker image to Container Registry and create App on DigitalOcean Platform Apps

The title speaks for itself, let’s jump right in!

As a preliminary step, we start from a user registered in DigitalOcean with a validated account.

Use the doctl tool for the entire communication process with DigitalOcean.

Step 1: Install doctl

$ cd ~
$ wget https://github.com/digitalocean/doctl/releases/download/v1.71.0/doctl-1.71.0-linux-amd64.tar.gz
$ tar xvf doctl-1.71.0-linux-amd64.tar.gz
$ sudo mv doctl /usr/local/bin


Step 2: Create an API token


Go to https://cloud.digitalocean.com/account/api/tokens

Generate new token for read and write and save apart the value of token generated

<TOKEN NAME>: personaltoken 
<TOKEN VALUE>: 6e981fc2a674dbb7a610b9b85d0c8b00

Step 3: Use the API token to grant account access to doctl

$ doctl auth init --context personaltoken
Validating token... OK

Prompt for <TOKEN VALUE>, then enter it and press return 
 

Step 4: Validate that doctl is working

$ doctl auth init 

Validating token... OK


Prompt for <TOKEN VALUE>, then enter it and press return 

Validate by obtaining the account information

$ doctl account get

Email      Droplet Limit    Email Verified    UUID         Status

[email protected]    10     true     5415bbf8-d501-4096-9b75-ab781c017948    active


Step 5: Create a Container Registry with doctl

<MY-REGISTRY-NAME> : container-nyc-795

<REGION> : nyc3

$ doctl registry create container-nyc-795 --region nyc3

Name       Endpoint        Region slug

container-nyc-795    registry.digitalocean.com/container-nyc-795    nyc3


Important: the region of the Container registry and Kubernetes cluster MUST be the same

Keep in mind that container names must be unique, must be lowercase, and only accepts alphanumeric characters and hyphens.


Step 6: Login to authenticate docker with your registry

$ doctl registry login
Logging Docker in to registry.digitalocean.com


Step 7: Create kubernetes cluster

$ doctl kubernetes cluster create cluster-static-example --region nyc3

Notice: Cluster is provisioning, waiting for cluster to be running

...................................................................

Notice: Cluster created, fetching credentials

Notice: Adding cluster credentials to kubeconfig file found in "/home/andres/.kube/config"

Notice: Setting current-context to do-nyc3-cluster-static-example

ID                                      Name                      Region    Version        Auto Upgrade    Status     Node Pools

d24f180b-6007-4dbc-a2fe-3952801570aa    cluster-static-example    nyc3      1.22.7-do.0    false           running    cluster-static-example-default-pool

Important: the region of the Container registry and Kubernetes cluster MUST be the same here as well. 

This operation isn’t a fast process.


Step 8: Integrate kubernetes cluster in Container register

$ doctl kubernetes cluster registry add cluster-static-example


Step 9: Get token certificate and connect to cluster

$ doctl kubernetes cluster kubeconfig save cluster-static-example

Notice: Adding cluster credentials to kubeconfig file found in "/home/andres/.kube/config"

Notice: Setting current-context to do-nyc3-cluster-static-example

To validate this, use the kubectl tool to get context. If is not installed, get the last version you find - for example in googleapis

$ wget https://storage.googleapis.com/kubernetes-release/release/v1.23.5/bin/linux/amd64/kubectl
$ chmod +x kubectl
$ sudo mv kubectl /usr/local/bin/

Check with

$ kubectl config current-context
do-nyc3-cluster-static-example

Here, you see: bash prompt do-ny3-cluster-sttic-example. That is the context you created in Step 7
 

Step 10: Generate docker image, tag and push to DigitalOcean

We assume that the user already has docker installed

$ mkdir myapp
$ mkdir myapp/html
$ nano myapp/Dockerfile


Inside Dockerfile put 


FROM nginx:latest
COPY ./html/hello.html /usr/share/nginx/html/hello.htm
l


We create simple Dockerfile with NGINX Server and copy the file hello.html in the default html of nginx


$ nano myapp/html/hello.html


Inside hello.html put


<!DOCTYPE html>

<html>

 <head>

   <title>Hello World!</title>

 </head>

 <body>

   <p>This is an example of a simple HTML page served from the Nginx container.</p>

 </body>

</html>

Then build a docker image file tag with repository and push with docker
 

$ cd myapp
$ docker build -t registry.digitalocean.com/container-nyc-795/static-app .

Sending build context to Docker daemon  3.584kB

Step 1/2 : FROM nginx:latest

latest: Pulling from library/nginx

c229119241af: Pull complete

2215908dc0a2: Pull complete

08c3cb2073f1: Pull complete

18f38162c0ce: Pull complete

10e2168f148a: Pull complete

c4ffe9532b5f: Pull complete

Digest: sha256:2275af0f20d71b293916f1958f8497f987b8d8fd8113df54635f2a5915002bf1

Status: Downloaded newer image for nginx:latest

 ---> 12766a6745ee

Step 2/2 : COPY ./html/hello.html /usr/share/nginx/html/hello.html

 ---> 2b9be913c377

Successfully built 2b9be913c377

Successfully tagged registry.digitalocean.com/container-nyc-795/static-app:latest


$ docker images

REPOSITORY                                               TAG       IMAGE ID       CREATED         SIZE

registry.digitalocean.com/container-nyc-795/static-app   latest    2b9be913c377   2 minutes ago   142MB


$ docker push registry.digitalocean.com/container-nyc-795/static-app

Using default tag: latest

The push refers to repository [registry.digitalocean.com/container-nyc-795/static-app]

ac03ae036a53: Pushed

ea4bc0cd4a93: Pushed

fac199a5a1a5: Pushed

5c77d760e1f4: Pushed

33cf1b723f65: Pushed

ea207a4854e7: Pushed

608f3a074261: Pushed

latest: digest: sha256:22615ad4c324ca5dc13fe2c3e1d2d801bd166165e3809f96ed6a96a2b2ca2748 size: 1777


Step 11: Create app

Create file example-static-app.yaml and insert:

alerts:                                 
- rule: DEPLOYMENT_FAILED               
- rule: DOMAIN_FAILED                   
name: example-static-app                
region: nyc                             
services:                               
- http_port: 80                         
  image:                                
    registry_type: DOCR                 
    repository: static-app              
    tag: latest                         
  instance_count: 2                     
  instance_size_slug: professional-xs   
  name: static-service                  
  routes:                               
  - path: /                             
  source_dir: /             
             

Validate file with

$  doctl apps spec validate example-static-app.yaml

Create app

$ doctl apps create --spec example-static-app.yaml
Notice: App created
ID        Spec Name             Default Ingress    Active Deployment ID    In Progress Deployment ID    Created At     Updated At
55a7cb68-65b7-4ff1-b6af-388cdb1df507    example-static-app   2022-03-30 09:34:01.288257225 +0000 UTC    2022-03-30 09:34:01.288257225 +0000 UTC

If you access https://cloud.digitalocean.com/apps

And in the live url + /hello.html you can see:

Step 12: Deploy app

If you modify the code of your app, you need to generate a new image with docker and push  (see step 10). Then you don’t need to create a new app, you need to deploy the image in the already created app, with the id executing the command to deploy in bash.

$  doctl apps create-deployment 55a7cb68-65b7-4ff1-b6af-388cdb1df507


How to generate deploy of Docker image to Container Registry on DigitalOcean Platform Apps

Once you have created the application (and if you have the code in gitlab), you can create a direct deployment of your code in the DigitalOcean container and deploy on top of your application.

Step 1: Define variables

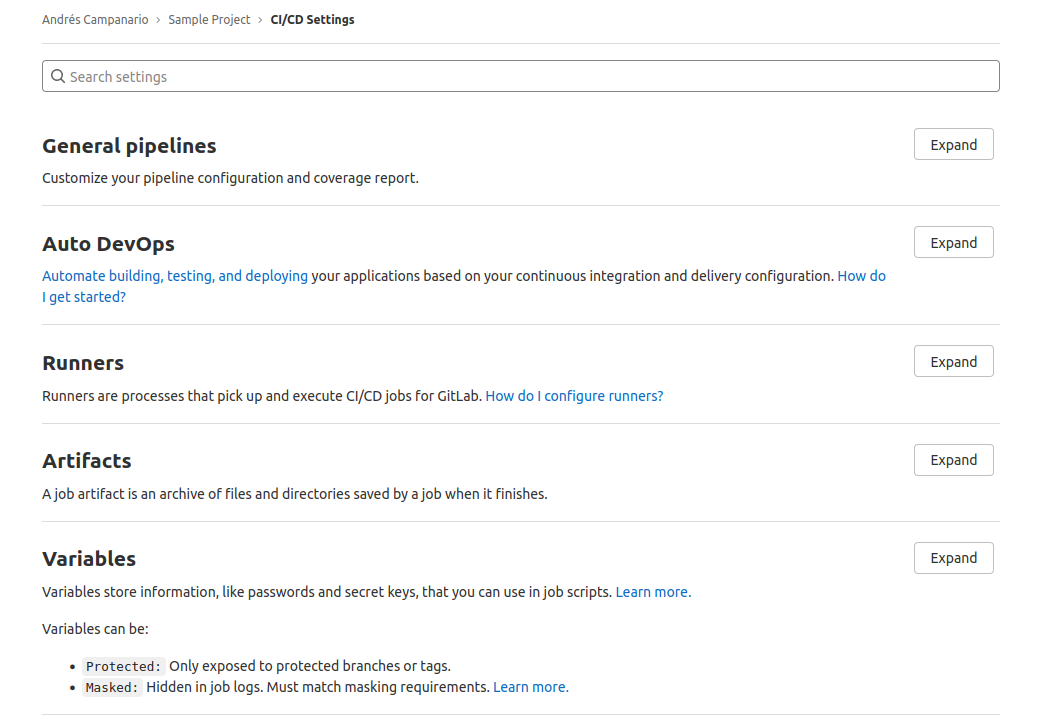
First two variables are defined in gitlab. You can find these inside project in the left menu - enter in Settings > CI/CD > Variables

$DIGITALOCEAN_API_KEY = token generated in DigitalOcean dashboard

$APP_ID = previously generated application identifier


More can be defined as the name of the repository. The value of these variables will be injected into the file that we will create below in the Step 3


Step 2: Register runner in gitlab

In your project in the left menu, go to Settings > CI/CD > Runners

Create a specific runner for the project in the URL with registration token. Register GitLab Runner from the command line. It is important to use docker and privileged

# Download the binary for your system
sudo curl -L --output /usr/local/bin/gitlab-runner https://gitlab-runner-downloads.s3.amazonaws.com/latest/binaries/gitlab-runner-linux-amd64

# Give it permission to execute
sudo chmod +x /usr/local/bin/gitlab-runner

# Register runner
sudo gitlab-runner register -n --url https://git.cakedc.com --registration-token GR1348941gx7sgV3pZFQgRqg5qUR_ --executor docker --description "My Docker Runner" --docker-image "docker:19.03.12" --docker-privileged --docker-volumes "/certs/client"


Step 3: Create file gitlab-ci.yml 

The gitlab-ci.yml file takes care of

  • Authentication and identification using doctl in DigitalOcean

  • Generating and sending the docker image to the DigitalOcean container

  • Deploying the container image to an existing app

Create the file gitlab-ci.yml in the root of your project as

image: docker:20-dind

variables:
  DOCKER_HOST: tcp://docker:2375
  DOCKER_DRIVER: overlay2
  DOCKER_TLS_CERTDIR: ""
  REPOSITORY_URL: registry.digitalocean.com/container-nyc-795/static-app
  CONTAINER_NAME: static-app

services:
  - name: docker:20-dind
    alias: docker
    command: ["--tls=false"]

before_script:
  - apk update
  - apk upgrade
  - apk add doctl --repository=http://dl-cdn.alpinelinux.org/alpine/edge/community
  - docker info

build:
  stage: build
  script:
    - doctl auth init --access-token $DIGITALOCEAN_API_KEY
    - doctl account get     
    - echo $DIGITALOCEAN_API_KEY | docker login -u $DIGITALOCEAN_API_KEY --password-stdin registry.digitalocean.com
    - docker build -t $REPOSITORY_URL:latest .
    - docker push $REPOSITORY_URL
    - doctl apps create-deployment $APP_ID

Now, every time you do a git push in your project, the runner will automatically inject the variables defined previously in the gitlab-ci.yml file. Then, it will generate a docker image with docker (docker-in-docker) to create an image of your project, send it to the digitalocean repository and deploy it in the app configured.


That’s it!


Latest articles

CakePHP AI Integration: Build a CakePHP MCP Server with Claude

Learn how to build a CakePHP MCP server (local) for AI integration.

Intro

Unless your crew left you stranded on a desert island earlier this year, I'm sure you've heard about every big name in the industry integrating their applications and exposing their data to "agents". Model Context Protocol https://modelcontextprotocol.io/docs/getting-started/intro was created to define how the your application could interact and provide features to Agents. These features could be readonly, but also methods (or tools) to allow the Agent operate with your application, for example, creating orders, updating post titles, reordering invoices, or creating reports for your bookings. As a developer, this is a quick win! Providing access, even readonly, could expand the quality of the interaction between your users and your application. In my opinion, the benefits are: Agents deal with context very well, they can use the conversation history, and also extract required data to use the available tools. Agents can transform the data, providing "features" to your users that you didn't implement. For example building charts on the fly, or creating scripts to transform the data for another tool. Quickly after the publication of the MCP protocol, the PHP community started working on a standarized SDK to help with the implementation of MCP servers. Even if the SDK is in active development right now, we are going to explore it and build a local MCP server, connecting Claude Desktop to it. The idea behind the example is to open your application to Claude Desktop, so the Agent (Claude) can connect directly to your code using the specified tools. For production environments, there are many other considerations we should be handling, like authorization, rate limiting, data exchange and privacy, etc. We'll leave all these production grade issues for another day and jump into an example you can implement "today" in your CakePHP application. Development vs. Production: This tutorial focuses on a local development setup for your CakePHP MCP server. Production environments require additional considerations including:
  • Authentication and authorization
  • Rate limiting
  • Data privacy and security
  • Audit logging
  • Input validation and sanitization
  • Error handling and monitoring

What is a CakePHP MCP Server?

A CakePHP MCP server is a specialized implementation that allows AI agents like Claude to interact with your CakePHP application through the Model Context Protocol. This CakePHP AI integration creates a bridge between your application logic and AI capabilities, enabling:
  • Natural language interfaces for complex queries
  • Automated content generation and management
  • Real-time data analysis and reporting

Prerequisites

Before starting, ensure you have:
  • PHP 8.1 or higher
  • Composer
  • SQLite or MySQL
  • Claude Desktop (free tier available)

Step 1: Set Up the CakePHP CMS Application

We'll use the official CakePHP CMS tutorial. # Clone the repository git clone https://github.com/cakephp/cms-tutorial cd cms-tutorial # Install dependencies composer install # Run database migrations bin/cake migrations migrate # Start the development server bin/cake server

Create a Test User

  1. Navigate to http://localhost:8765/users/add
  2. Create a new user with your preferred email and password
  3. Log in at http://localhost:8765/users/login
  4. Verify you can create an article via http://localhost:8765/articles/add

Step 2: Install Claude Desktop

Download and install Claude Desktop from https://claude.com/download

Step 3: Install the CakePHP MCP Plugin

To build your CakePHP MCP server, install the MCP utility plugin and SDK in your CakePHP project: composer require cakedc/cakephp-mcp:dev-2.next-cake5 mcp/sdk:'dev-main#4b91567' Note: These packages are in active development.

Step 4: Create the CakePHP MCP Server Script

Create a new file bin/mcp to initialize your CakePHP MCP server: #!/usr/bin/env sh cd /absolute/path/to/your/cms-tutorial && php vendor/cakedc/cakephp-mcp/bin/mcp-server Important: Replace /absolute/path/to/your/cms-tutorial with your actual project path. For example: /home/user/cms-tutorial or C:\Users\YourName\cms-tutorial Make the script executable: chmod +x bin/mcp

Step 5: Create Your First CakePHP MCP Tool

Create the file: src/Mcp/Articles.php <?php namespace App\Mcp; use App\Model\Entity\Article; use Cake\ORM\Locator\LocatorAwareTrait; use Mcp\Capability\Attribute\McpTool; class Articles { use LocatorAwareTrait; #[McpTool(name: 'createArticle')] public function createArticle(string $title, string $body): array { try { $article = new Article([ 'title' => $title, 'body' => $body, 'user_id' => $this->fetchTable('Users')->find()->firstOrFail()->id, // a default user ID for simplicity ]); if (!$this->fetchTable('Articles')->save($article)) { return [ 'success' => false, 'message' => 'Failed to create article: ' . json_encode($article->getErrors()), ]; } return [ 'success' => true, 'message' => 'Article created successfully', ]; } catch (\Throwable $e) { return [ 'success' => false, 'message' => 'Exception to create article: ' . $e->getMessage(), ]; } } } The #[McpTool] Attribute: This PHP 8 attribute registers the method as an MCP tool that Claude can discover and use in your CakePHP AI integration. The name parameter defines how Claude will reference this tool. Simplified User Assignment: For demonstration purposes, we're using the first available user. In production CakePHP AI integrations, you'd implement proper user authentication and context.

Step 6: Configure Claude Desktop for CakePHP MCP Integration

Add your CakePHP MCP server to Claude Desktop's configuration:
  1. Open Claude Desktop
  2. Go to Settings → Developer → Edit Config
  3. Add your MCP server configuration:
{ "mcpServers": { "cakephp-cms": { "command": "/absolute/path/to/your/cms-tutorial/bin/mcp" } } }
  1. Save the configuration and restart Claude Desktop

Step 7: Test Your CakePHP AI Integration

Once Claude Desktop restarts, you should see your CakePHP MCP server connected:
  1. MCP Server Connected: Look for the server indicator in Claude Desktop showing your CakePHP MCP integration is active
  2. Available Tools: You can view available CakePHP MCP tools by clicking the tools icon
  3. The createArticle tool: Should appear in the list of available tools
  4. Now you can use the Claude Desktop prompt to generate articles, that will be saved directly into your CakePHP application!

Wrapping up

You've successfully built a CakePHP MCP server and implemented CakePHP AI integration with Claude! This Model Context Protocol CakePHP implementation opens up powerful possibilities for AI-enhanced user experiences and automation in your web applications.

CakeFest 2025 Wrap Up

For years I have heard the team talk about Madrid being one of their favorite cities to visit, because they hosted CakeFest there more than a decade ago. I can now confirm… they were right! What a beautiful city. Another great CakeFest in the books… Thanks Madrid!   Not only are we coming down from the sugar high, but we are also honored to be celebrating 20 years of CakePHP. It was amazing to celebrate with the attendees (both physical and virtual). If you watched the cake ceremony, you saw just how emotional it made Larry to reminisce on the last 20 years. I do know one thing, CakePHP would not be where it is without the dedicated core, and community.    Speaking of the core, we had both Mark Scherer and Mark Story joining us as presenters this year. It is a highlight for our team to interact with them each year. I know a lot of the other members from the core team would have liked to join us as well, but we hope to see them soon. The hard work they put in day after day is unmatched, and often not recognized enough. It’s hard to put into words how grateful we are for this group of bakers.    Our event was 2 jam packed days of workshops and talk presentations, which you can now see a replay of on our YouTube channel (youtube.com/cakephp). We had presenters from Canada, Germany, India, Spain, USA, and more! This is one of my favorite parts about the CakePHP community, the diversity and representation from all over the world. When we come together in one room, with one common goal, it’s just magical. Aside from the conference itself, the attendees had a chance to network, mingle, and enjoy meals together as a group.  I could sense the excitement of what’s to come for a framework that is very much still alive. Speaking of which… spoiler alert: CakePHP 6 is coming. Check out the roadmap HERE.   I feel as though our team leaves the event each year with a smile on their face, and looking forward to the next. The events are growing each year, although we do like to keep the small group/intimate type of atmosphere. I am already getting messages about the location for next year, and I promise we will let you know as soon as we can (when we know!). In the meantime, start preparing your talks, and send us your location votes.   The ovens are heating up….

Polymorphic Relationships in CakePHP: A Beginner's Guide

Have you ever wondered how to make one database table relate to multiple other tables? Imagine a comments table that needs to store comments for both articles and videos. How do you manage that without creating separate tables or complicated joins? The answer is a polymorphic relationship. It sounds fancy, but the idea is simple and super powerful.

What's a Polymorphic Relationship?

Think of it this way: instead of a single foreign key pointing to one specific table, a polymorphic relationship uses two columns to define the connection. Let's stick with our comments example. To link a comment to either an article or a video, your comments table would have these two special columns:
  1. foreign_id: This holds the ID of the related record (e.g., the id of an article or the id of a video).
  2. model_name: This stores the name of the model the comment belongs to (e.g., 'Articles' or 'Videos').
This flexible setup allows a single comment record to "morph" its relationship, pointing to different types of parent models. It's clean, efficient, and saves you from a lot of redundant code. It's not necessary for them to be called "foreign_id" and "model_name"; they could have other names (table, model, reference_key, model_id, etc.) as long as you maintain the intended function of each. Now, let's see how you can set this up in CakePHP 5 without breaking a sweat.

Making It Work in CakePHP 5

While some frameworks have built-in support for polymorphic relationships, CakePHP lets you create them just as easily using its powerful ORM (Object-Relational Mapper) associations. We'll use the conditions key to define the polymorphic link.

Step 1: Set Up Your Database

We'll use a simple schema with three tables: articles, videos, and comments. -- articles table CREATE TABLE articles ( id INT AUTO_INCREMENT PRIMARY KEY, title VARCHAR(255) ); -- videos table CREATE TABLE videos ( id INT AUTO_INCREMENT PRIMARY KEY, title VARCHAR(255) ); -- comments table CREATE TABLE comments ( id INT AUTO_INCREMENT PRIMARY KEY, content TEXT, foreign_id INT NOT NULL, model_name VARCHAR(50) NOT NULL ); Notice how the comments table has our special foreign_id and model_name columns.

Step 2: Configure Your Models in CakePHP

Now for the magic! We'll define the associations in our Table classes. ArticlesTable.php In this file, you'll tell the Articles model that it has many Comments, but with a specific condition. // src/Model/Table/ArticlesTable.php namespace App\Model\Table; use Cake\ORM\Table; class ArticlesTable extends Table { public function initialize(array $config): void { // ... $this->hasMany('Comments', [ 'foreignKey' => 'foreign_id', 'conditions' => ['Comments.model_name' => self::class], // or 'Articles' 'dependent' => true, // Deletes comments if an article is deleted ]); } } Use self::class is a best practice in modern PHP, as it prevents bugs if you ever decide to rename your classes, and your IDE can auto-complete and check it for you VideosTable.php You'll do the same thing for the Videos model, but change the model_name condition. // src/Model/Table/VideosTable.php namespace App\Model\Table; use Cake\ORM\Table; class VideosTable extends Table { public function initialize(array $config): void { // ... $this->hasMany('Comments', [ 'foreignKey' => 'foreign_id', 'conditions' => ['Comments.model_name' => self::class], // or 'Videos' 'dependent' => true, ]); } } CommentsTable.php This table is the owner of the polymorphic association. You can add associations here to easily access the related Article or Video from a Comment entity. // src/Model/Table/CommentsTable.php namespace App\Model\Table; use Cake\ORM\Table; class CommentsTable extends Table { public function initialize(array $config): void { // ... $this->belongsTo('Articles', [ 'foreignKey' => 'foreign_id', 'conditions' => ['Comments.model_name' => \App\Model\Table\ArticlesTable::class], // or 'Articles' ]); $this->belongsTo('Videos', [ 'foreignKey' => 'foreign_id', 'conditions' => ['Comments.model_name' => \App\Model\Table\VideosTable::class], // or 'Videos' ]); } }

Step 3: Using the Relationship

Now that everything is set up, you can fetch data as if it were a normal association. Fetching Comments for an Article: $article = $this->Articles->get(1, ['contain' => 'Comments']); // $article->comments will contain a list of comments for that article Creating a new Comment for a Video: $video = $this->Videos->get(2); $comment = $this->Comments->newEmptyEntity(); $comment->content = 'This is an awesome video!'; $comment->foreign_id = $video->id; $comment->model_name = \App\Model\Table\VideosTable::class; // or 'Videos' $this->Comments->save($comment); As you can see, the model_name and foreign_id fields are the secret sauce that makes this pattern work.

What About the Future? The Power of This Solution

Now that you've got comments working for both articles and videos, what if your app grows and you want to add comments to a new model, like Photos? With this polymorphic setup, the change is incredibly simple. You don't need to alter your comments table at all. All you have to do is: Create your photos table in the database. Add a new PhotosTable.php model. In the new PhotosTable's initialize() method, add the hasMany association, just like you did for Articles and Videos. // src/Model/Table/PhotosTable.php namespace App\Model\Table; use Cake\ORM\Table; class PhotosTable extends Table { public function initialize(array $config): void { // ... $this->hasMany('Comments', [ 'foreignKey' => 'foreign_id', 'conditions' => ['Comments.model_name' => self::class], 'dependent' => true, ]); } } That's it! You've just extended your application's functionality with minimal effort. This demonstrates the true power of polymorphic relationships: a single, scalable solution that can easily adapt to your application's evolving needs. It's a key pattern for building flexible and maintainable software.

Conclusion

This approach is flexible, scalable, and a great way to keep your database schema simple. Now that you know the basics, you can start applying this pattern to more complex problems in your own CakePHP applications!

We Bake with CakePHP